How Can We Help?
-
Introduction
-
System Operation and Safety
-
Arago Assembly and Installation
-
Arago Control
-
FAQs
Camera Tethering Support
Overview
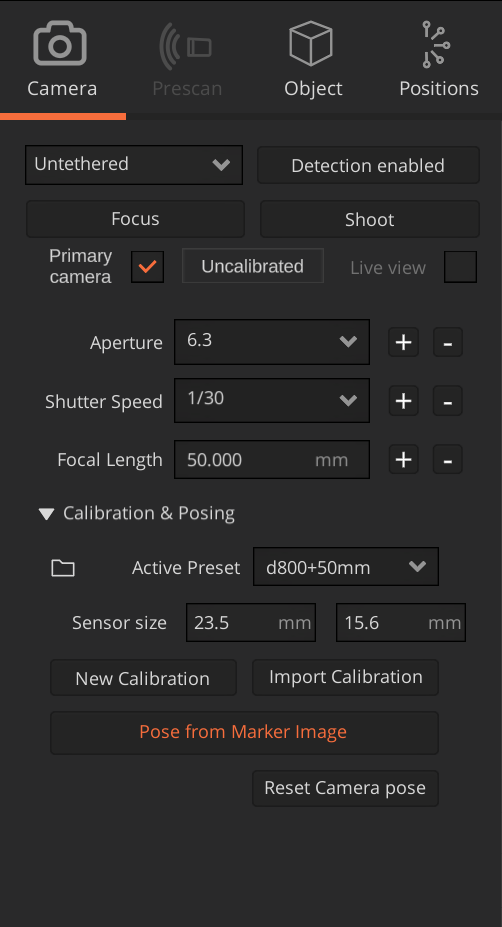
Untethered mode is the initial mode when there is no camera connected to the PC via Arago or when the camera model is incompatible with the Tethering Support. In this mode the Camera panel is limited to only a few settings which can be manually changed by the user.
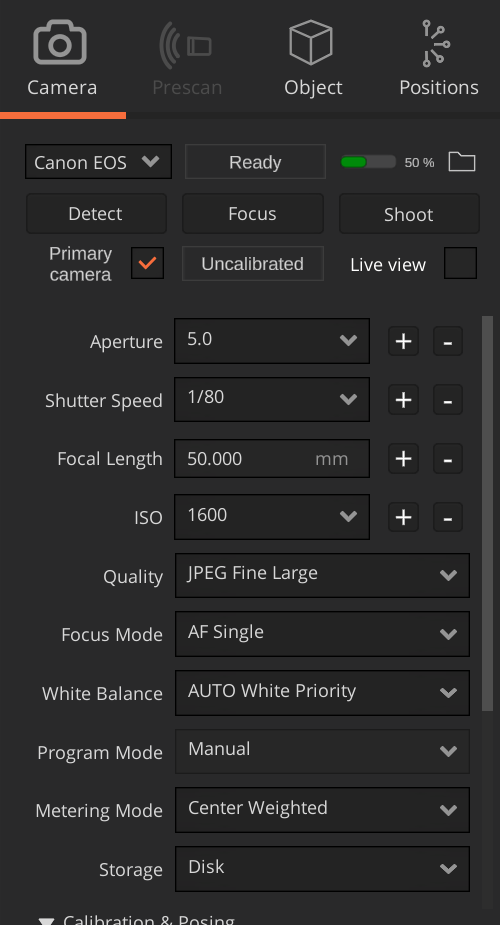
Tethered mode is initiated as soon as a compatible camera is connected to Arago. Starting Arago Control also starts the listener for detecting connected cameras. Initially, if there are no cameras connected, the panel will be available only with general settings in untethered mode.
To activate the Camera Tethering Support you must login to Arago Control with the provided credentials. This is a one-time requirement and the activation will persist across sessions and updates.
Untethered mode
Untethered mode initiates by default. In this mode, only Aperture, Shutter Speed and Focal Length are displayed and are required by Arago Control to calculate distortion coefficients used in depth-of-field computations of auto-generated positions. In this mode, users are required to manually input the values to align with the camera settings.
Camera Calibration and Posing is also possible and should be done before proceeding to travel and take images.

Tethering to Your Camera
Once mounted on Arago, connect the Camera via USB to one of the ports available in the back of the tilt. If you are using one of the cameras mentioned in the list of compatible cameras, Arago Control will automatically connect to it and load all the settings.

There can be settings such as Program Mode which are not editable via software, depending on the used camera model and the underlying software operating system that the camera has to offer.
It is highly important to Calibrate and Pose the camera before capturing images with Arago.
Multi-Cam Support
The Camera Tethering Support can connect to up to 3 cameras simultaneously, mounted on Arago. In this case, you need to specify which camera is your primary camera.
To change between cameras, you can open the camera dropdown and select a different camera.
The primary camera should be indicated by the user. Arago Control automatically sets the first connected camera as primary camera. However, we recommend to mark as primary camera the unit mounted in the center of the tilt element. The other cameras will act as supporting cameras.
When connecting multiple cameras, remember that your captured dataset expands with each additional camera. In such scenarios, it is recommended to generate fewer positions, but with more dispersion, as the parallax effect is guaranteed by the supporting camera(s).
Live View

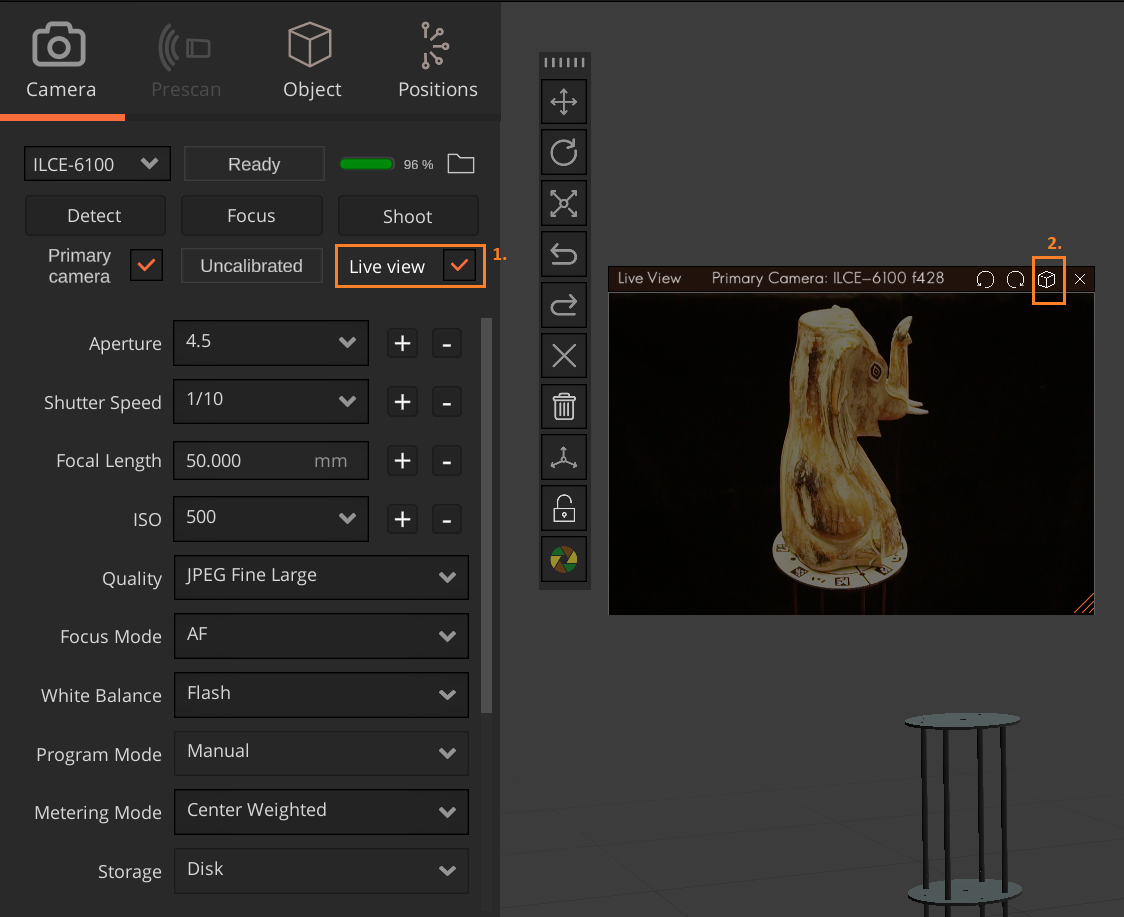
Multiple live views can be opened in parallel for each connected camera.
Image Download Path
All downloaded images go to the Images directory of your project. If no project has been created or selected, images will be downloaded to Pictures/Arago Control.
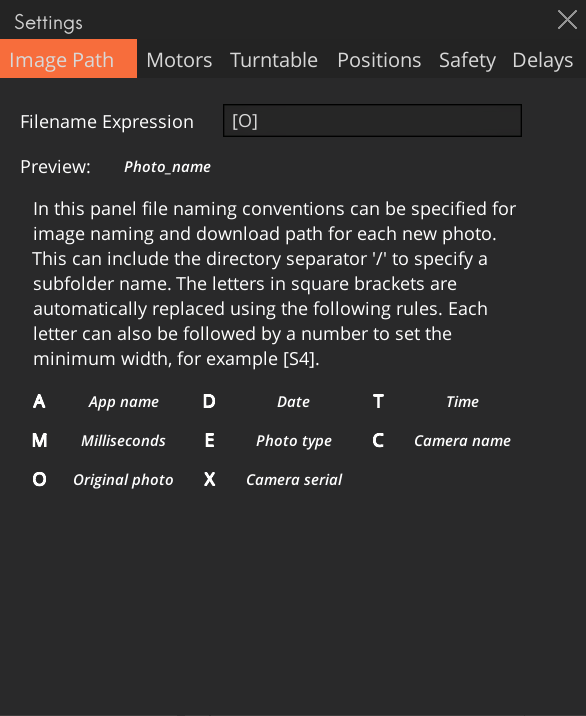
You can specify your own naming conventions for downloaded image files by setting a custom file naming expression in the Image Path tab of Arago Control Settings. To open Settings, navigate to View and click Settings.
To compose a file naming expression, use the accepted capital letters in between square brackets. Make sure the Preview of your expression is valid (the text is not in red). Here are a few examples of naming conventions:
[C]/[E]/[O] = camera_name/photo_type/photo_name i.e. Canon_R5/JPG/IMG_0000.JPG
Polarised/[O] = Polarised/photo_name i.e. Polarised/IMG_1234.jpg
