How Can We Help?
Camera Calibration and Posing
Overview
This section describes the process and best practices for calibrating your camera installed on Arago.
It is essential to calibrate the camera after mounting it on Arago to calculate all its intrinsics such as position and orientation in space, field of view and focal length. All resulting values collectively contribute to an optimal set of captured images used for reconstructing your subject. Arago Control utilizes the calibration values when interpreting camera live view AR overlap, positioning the camera 3D twin representation, automatic positions generator, camera focus frustum, and computing the coverage heatmap.
The calibration process has to be performed only once per camera+lens combination. Resulting calibration values are then saved as a calibration preset and can be re-used in your future projects.
If Arago Control cannot tether to the camera, the calibration process should still be done.
 | WARNING Skipping the camera calibration and posing step can lead to misbehaviour of safety algorithms and cause potential damage. Generated travel positions will not be accurately representative of the camera physical location and orientation which can result in an incorrect travel path. |
Recommendations
For the best possible automatic capture of marker images for calibration it is recommended to:
- Use prime lenses below 80mm in focal length.
- Use a good ambient diffused lighting setup.
LightArray note
When using LightArray as a primary light source for calibration, it is highly advised to switch to the ‘ALL’ triggering mode with polarization Enabled. - Aperture or F-stop number of f8+. Make sure the calibration chart is in full focus.
- Once the images are taken make sure the calibration chart is fully visible in all images taken.
- Calibration chart has to be fastened on the turntable extension with provided screws. Make sure the chart doesn’t vibrate or shake during the capture process.
New Calibration setup
In the ‘Calibration & Posing’ section of the Camera panel click ‘New Calibration’. This opens the ‘Camera & Lens Calibration’ window.

1. Place the Calibration Chart
on the second level of the turntable extension (at 60cm/23.6″ height). Follow the installation steps outlined in the Turntable extension installation guide. Make sure the chart and the turntable extension are fully mounted and are not causing vibration or shakiness during movement.
 | NOTE Inspect the calibration chart for any visual deformations, dust or stains. The surface of the chart should be straight and clean to achieve accurate calibration results. |
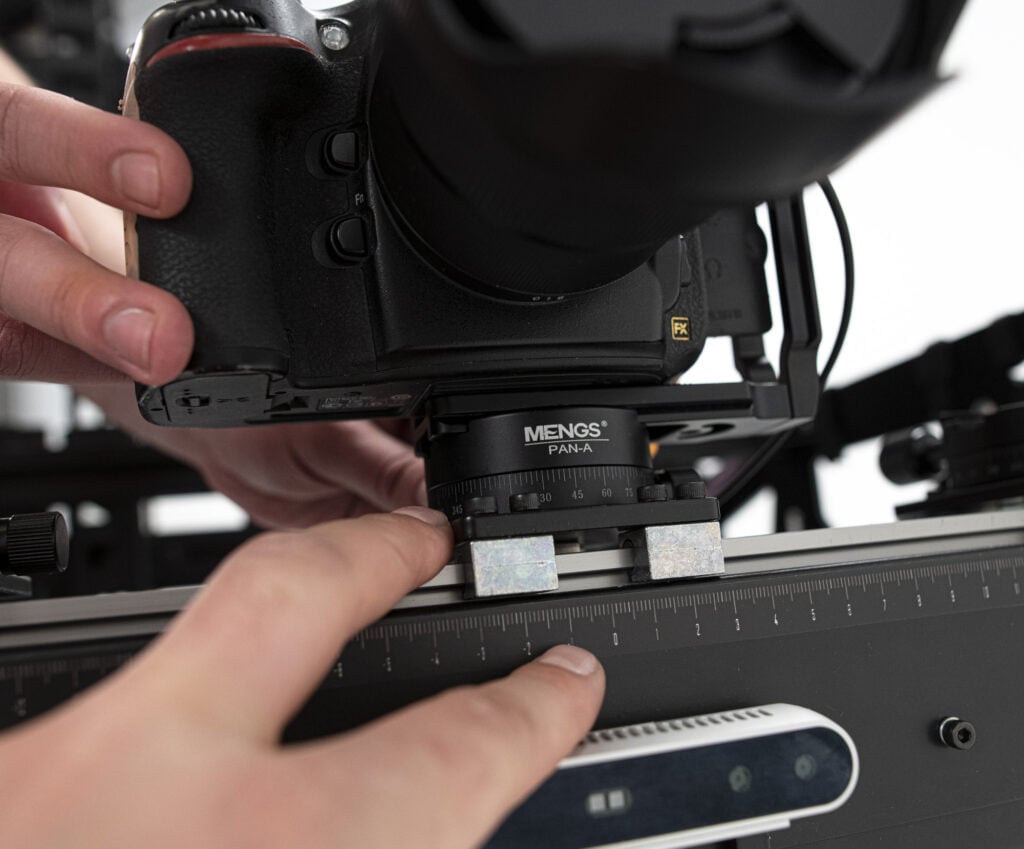
2. Mount the Camera
on Arago horizontally (landscape) with the provided bracket and the shoe mount. Make sure the camera is visually centred on the tilt element. Use the sliding bracket to re-adjust and secure if necessary.
3. Drive Manually Arago
with the camera live view ON until the calibration chart is fully framed in the camera’s field of view. Make sure the chart is front-facing the camera.

4. Start Capture for Calibration
First of set Quality in the Camera Tethering panel to JPEG Fine Large or similar. Make sure you have a clear scene (no positions or proxy models) and Click on ‘Start Capture for Calibration’. This action will load a list of positions along with a chart 3D model acting as a scan volume and activate panel for starting the capture travel.
 Make sure everything is in place and begin capture for calibration by clicking the ‘Play’ icon in the capture panel. The travel should take roughly 3 minutes.
5. Start Calibration from Images
When the image capturing process is finished, move on to ‘Start Calibration from Images’ and select all the images taken. At this point, it is recommended to inspect images for any out-of-focus or miss-framed images and discard them from the selection. The calibration process will automatically begin after selecting images. This process might take up to 10 minutes depending on the power of your computer. During the calibration process, you can observe the calibration results per image and detected markers. It is possible to identify problematic images by observing individual ‘Reprojection Error’ values. In case any major error value is present, repeat the capture process.

6. Evaluate Calibration Computation Result
When the calibration process is finished, the results are displayed. The important part at this point is the ‘Reprojection Error’ shown in bold. The reprojection error should be minimal. The result is color-coded in the following way:
Green – a good reprojection error of <1
Yellow – an average reprojection error of 1-2. In case you observe digital camera placement or field-of-view discrepancies in comparison to the physical camera – try re-starting the process.
Red – a bad reprojection error of >2. It is recommended to restart the calibration process. The results are too erroneous to be used for effective calibration.

7. Save Calibration Configuration
Now you can save the calibration file generated as a ‘Calibration Preset’. This preset can also be exported. The preset will be available for later use within the ‘Calibration Preset’ dropdown in the ‘Calibration & Posing’ tab of your primary camera. We recommend naming the calibration preset in a way that describes the camera & lens combination used i.e. “NikonD850+50mm”.
8. Camera Posing: Alignment Calibration
Effectively, the camera calibration is done by taking a picture of another marker already installed on the rig. In order to pose the virtual camera in relation to the physical one, it is required to take a single image of the marker placed in front of Arago’s X-axis as illustrated in the following image.

Manually drive Arago unit by using the motion controls until the marker is fully visible by the camera and is targeted at an approximate 45 degree angle. Placement of the camera to take the posing image doesn’t have to be too precise as long as the marker is in focus.
In the ‘Calibration & Posing’ tab of your camera click on a ‘Take Marker Photo and Pose’. This action snaps a photo and calibrates the camera based on the selected “Active Preset”. Make sure the preset matches the used camera setup. In case the process is done with a camera incompatible with the Camera Tethering Support, Arago Control will prompt to load the image manually.
If the virtual camera live view and the primary camera live view do not adjust properly to match, make sure the marker is in focus when taking an image. This can also happen if the reprojection error is too high.
| WARNING It is important the camera is not moved manually after posing, as this invalidates the process. If the camera is moved, repeat step (8). |
At this point, the virtual camera position and field of view are re-adjusted and the calibration process is completed.