How Can We Help?
-
Introduction
-
System Operation and Safety
-
Arago Assembly and Installation
-
Arago Control
-
FAQs
Scanning Guide using Prescan and Positions Generator
Overview
Prescan
With Prescan, you can capture the intricate shape, curvature, and spatial position of your object before the actual scanning process begins. This innovative tool establishes a proxy 3D model, providing invaluable insights into optimal camera positions and ensuring seamless mesh reconstruction.
This will automatically instantiate in the scene the Prescan bounding box which we will describe later in this guide.
It is imperative that the USB connection is of type 3.x or higher to allow high speed data transfers between the Intel RealSense sensor and the PC.
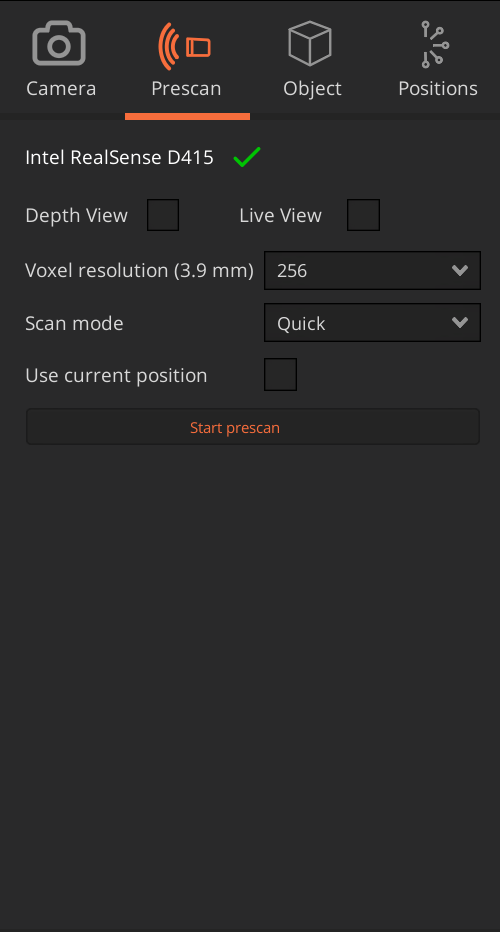
Depth View and Live View
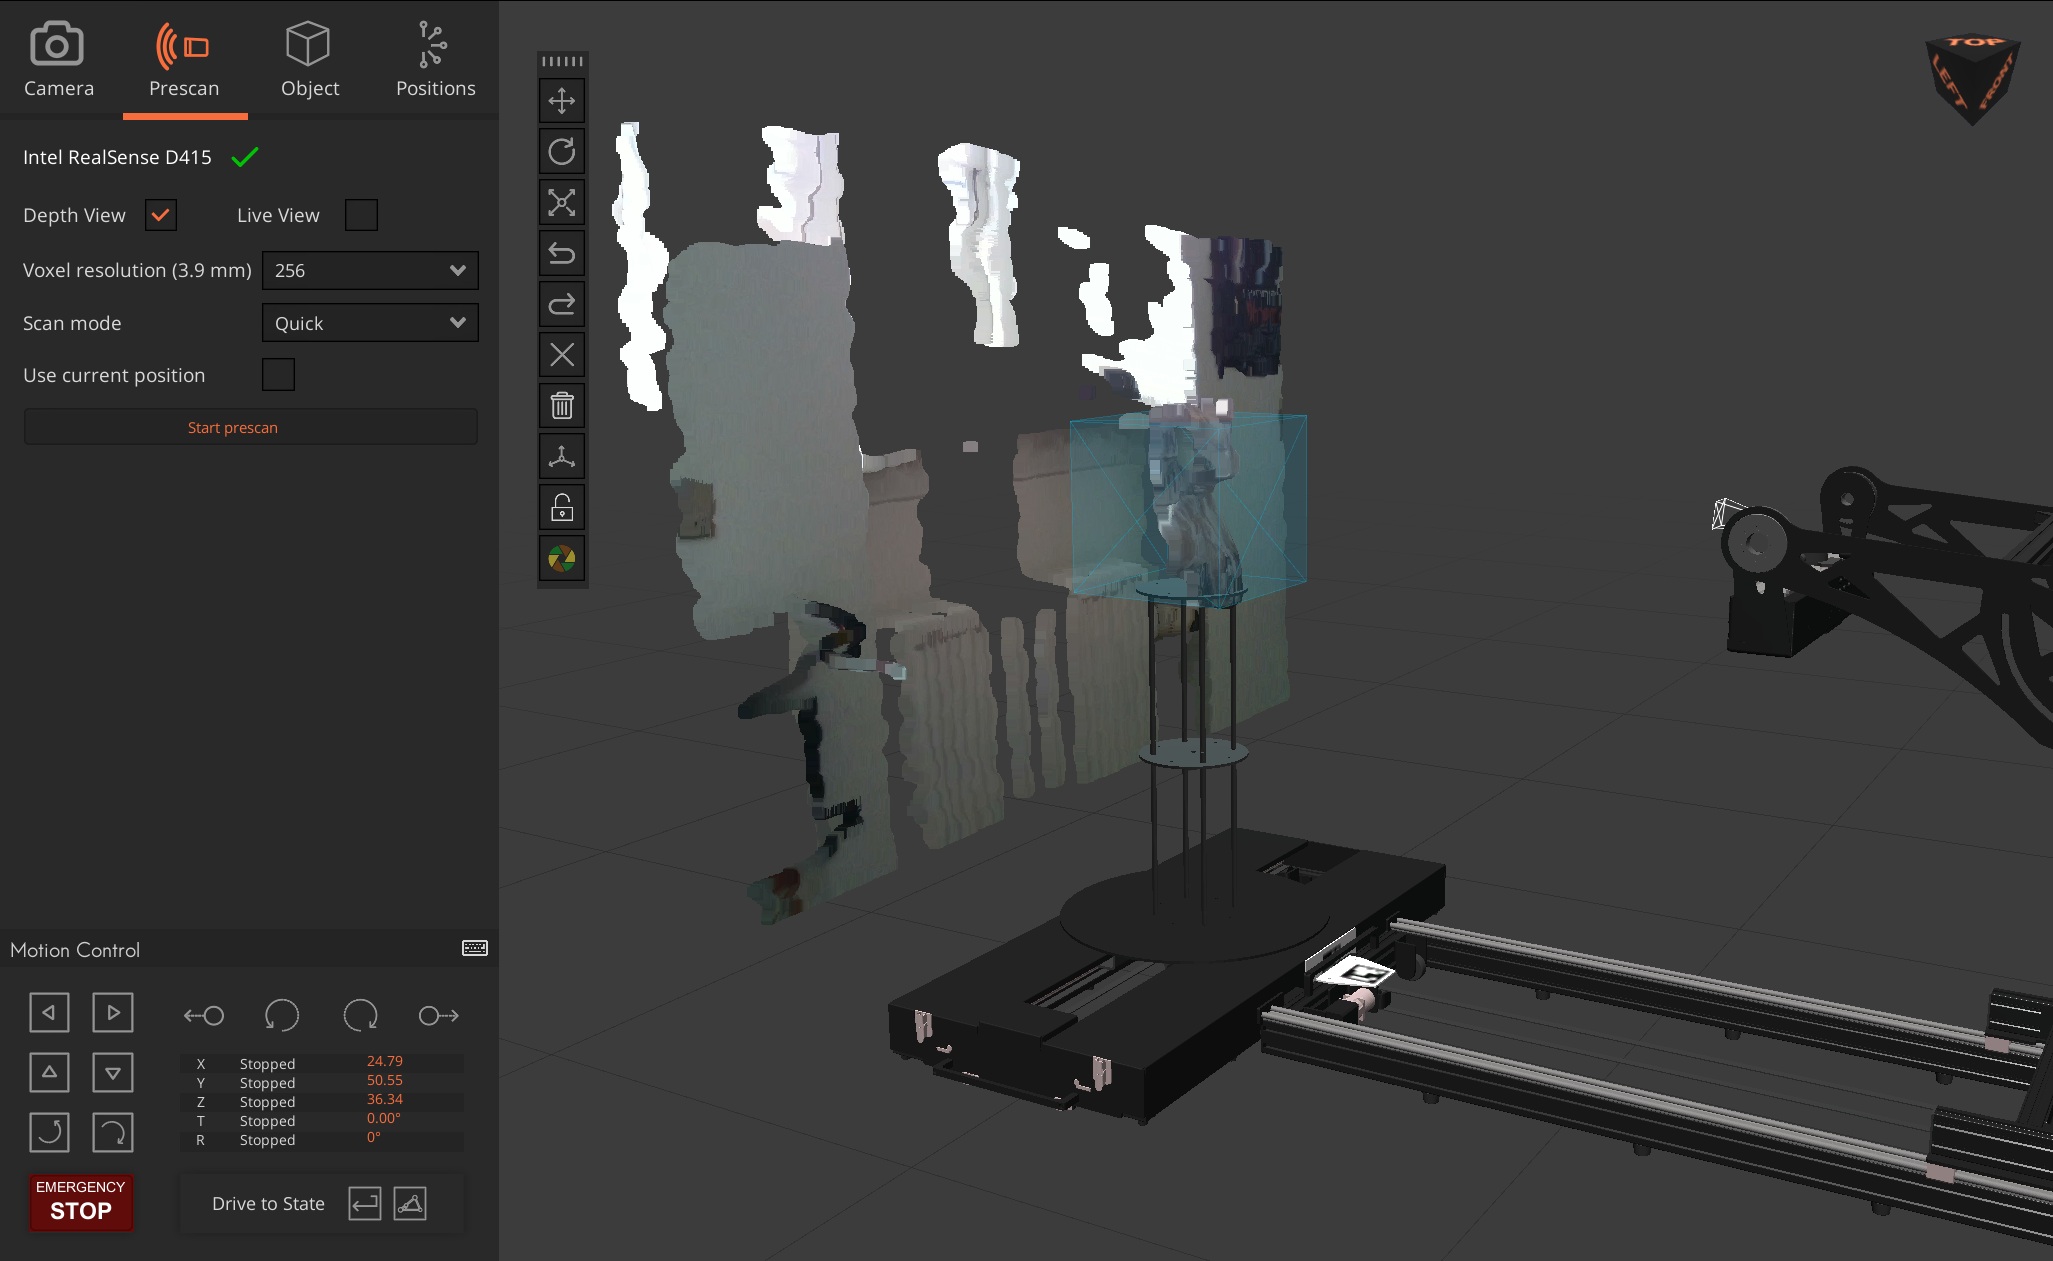
These two toggles enable the Intel RealSense sensor and starts streaming depth data into Arago Control. Depth View allows the user to display the data as a point cloud in the scene. The Live View showcases the flat RGB data, similar to the Camera Tethering Support live view.
Click on Depth View and enable the sensor.
Voxel resolution. If increased, the Prescan reconstruction algorithm will increase in data granularity. This is helpful if you are scanning smaller objects.
Scan mode. There are three available modes and they can be described as follows:
- Quick – 1 spin around the bounding box. In most cases this mode is sufficient to get a rough mesh.
- Regular – 2 spins around the bounding box, one in the middle and one from the top.
- Full – 3 spins around the bounding box, 2 the same as the Regular, plus one rotation from below.
Bounding Box
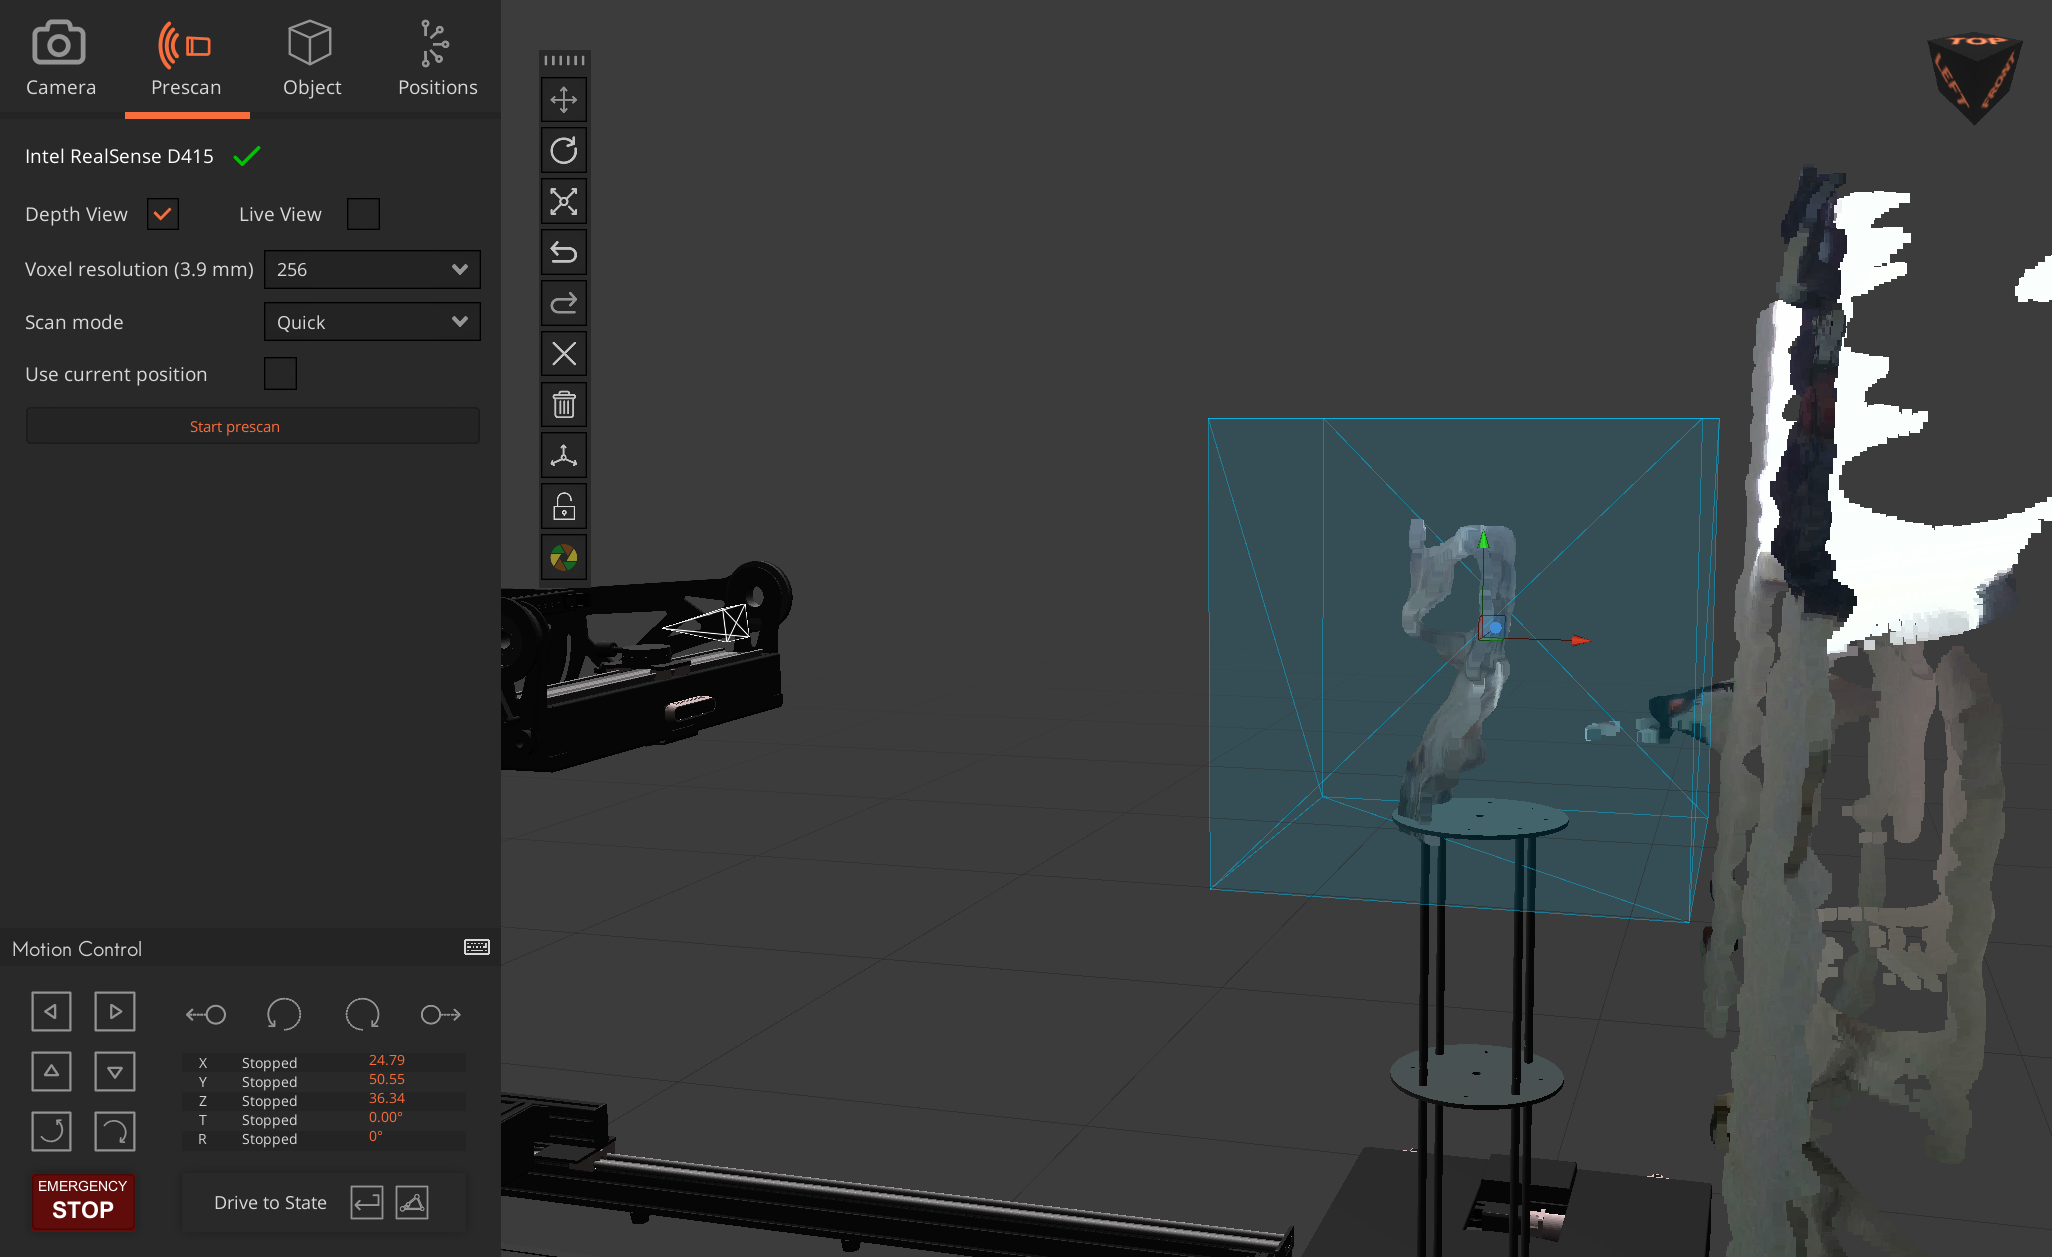
When the Prescan panel is opened, an opaque box is also created in the scene. The space enclosed by this box will determine the region processed during mesh reconstruction.
It is essential that your object is fully contained in the box. Re-adjust the size and the location of the box to fully contain the object. To accommodate the turntable spin, it is recommended to make this box larger than the object by 1/3.
Reconstruction
Once ready, click “Start Prescan” and wait for the travel and reconstruction to finish. 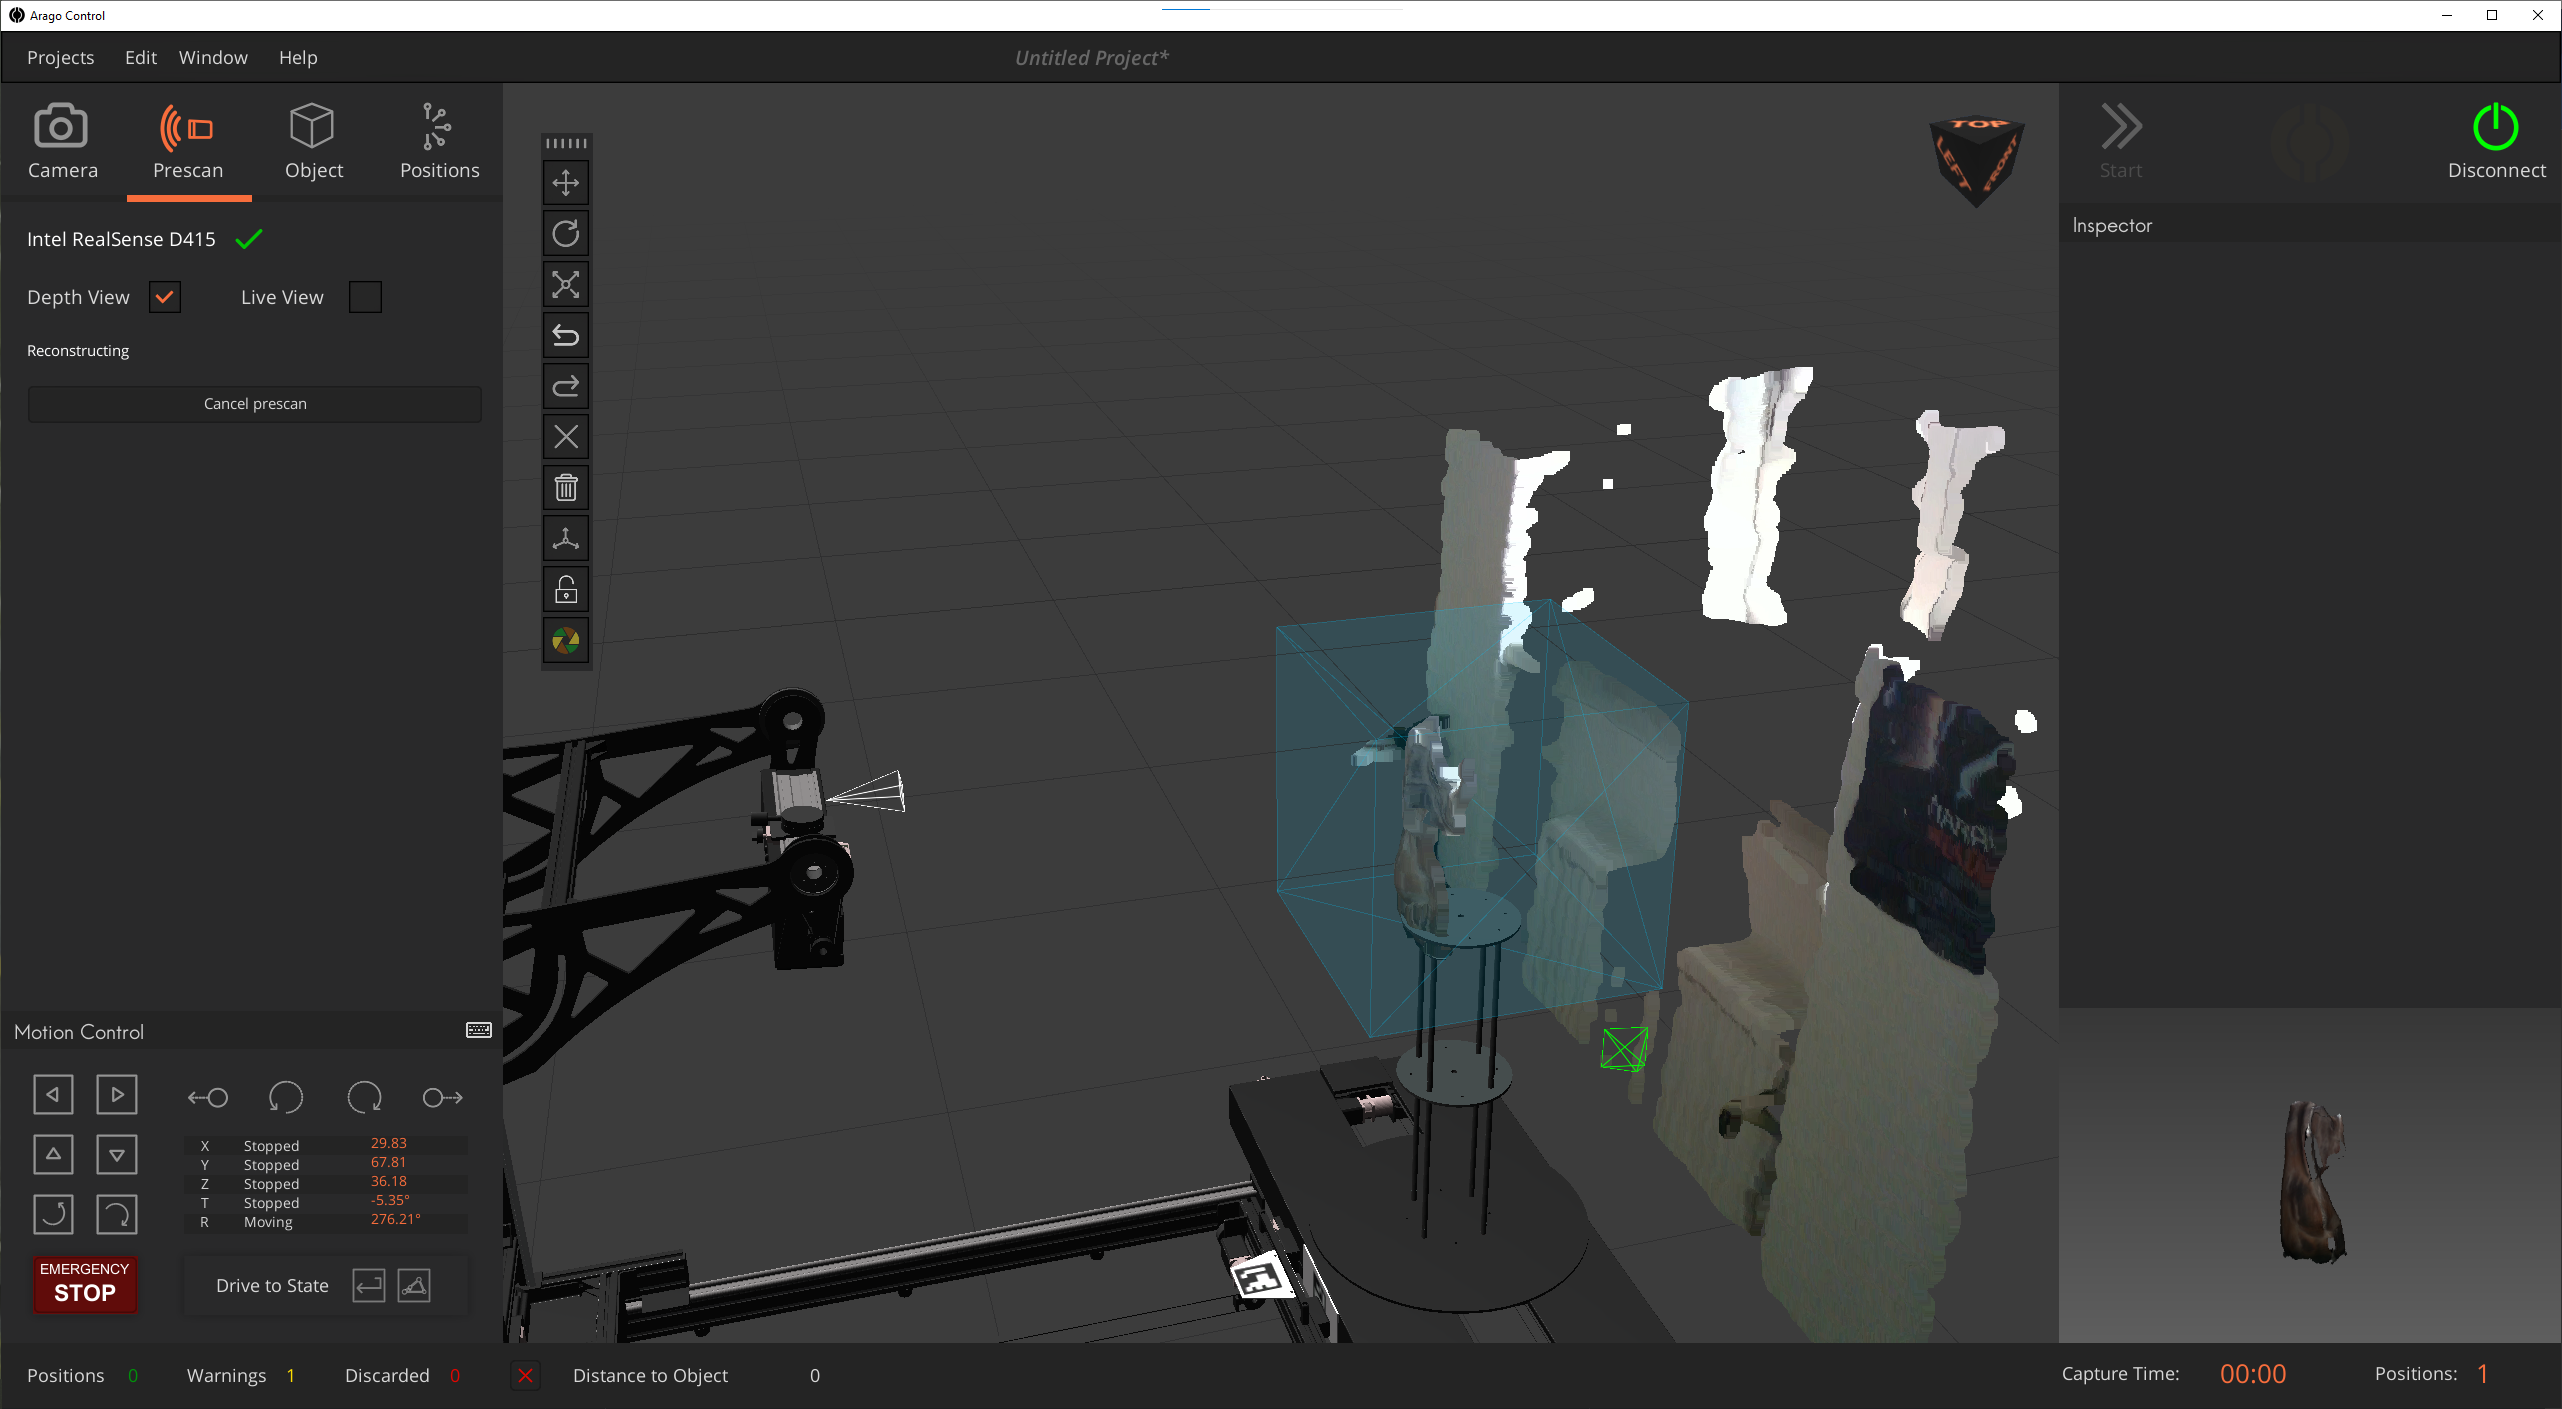
In case the alignment process is failing, the process can be canceled at any time and restarted.
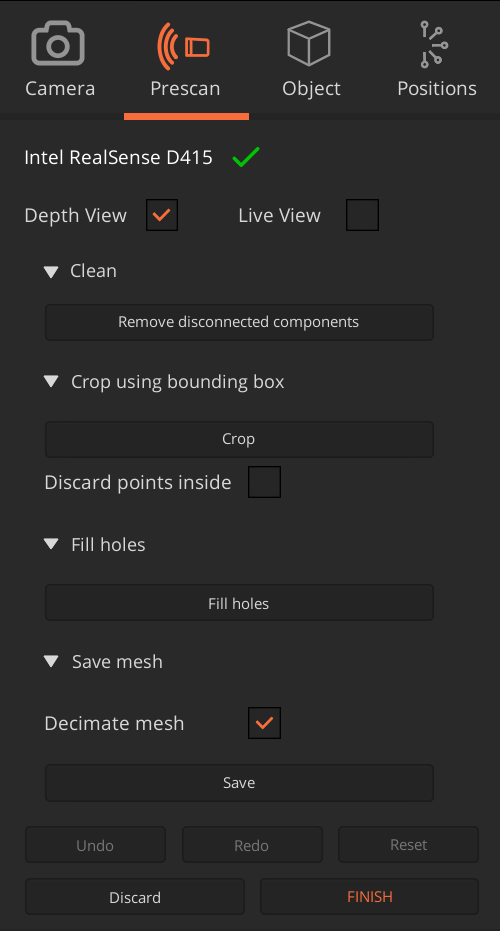
Reconstruction Post-processing
Alternatively, the mesh can also be saved if necessary for future scans, though the same functionality can be achieved by simply saving the project.
Click “Finish” once all desired post-processing corrections have been completed. Please note that this action cannot be reversed. Finish, will automatically fill-holes in the mesh and decimate the model for optimal computation times and open the Positions panel in the “Auto” mode which we describe in the next section.
Automatic Positions Generator
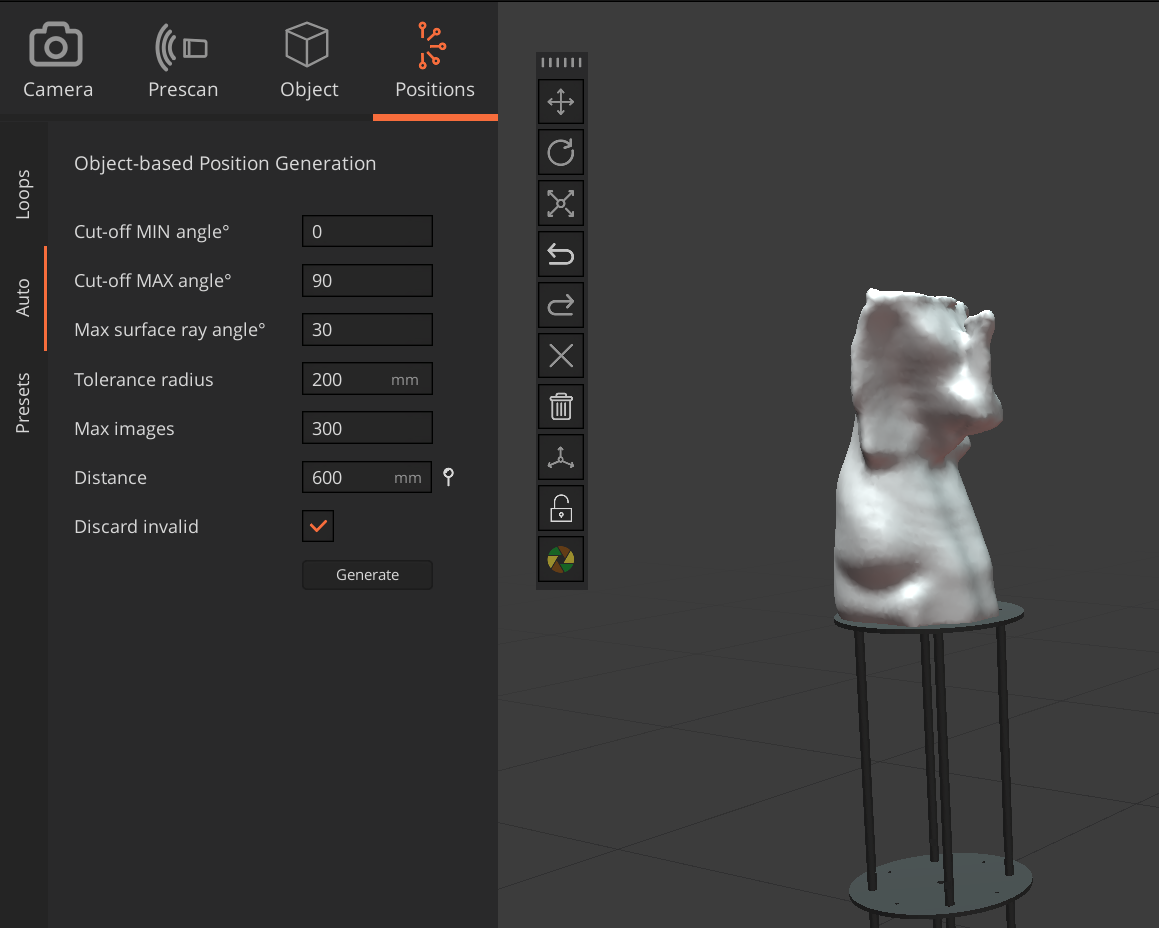
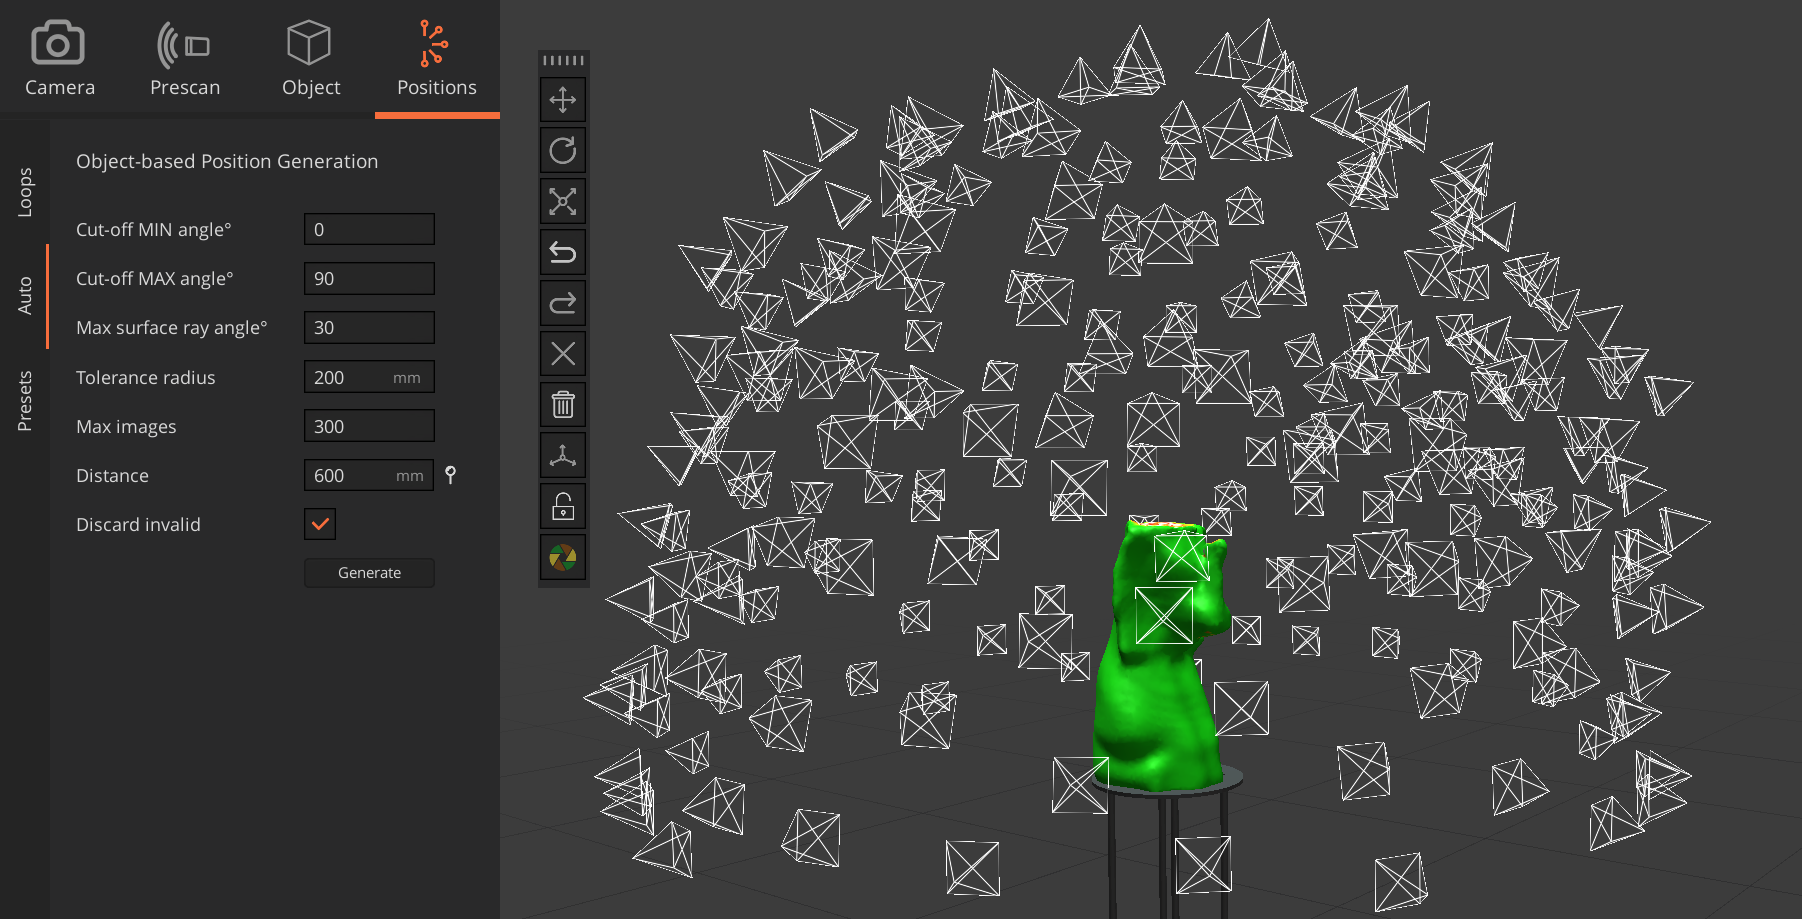
The algorithm is based on curvature analysis and ray-tracing and uses your the primary camera sensor size and the focal length to calculate the depth of field frustrum.
You can utilize the feature iteratively until you attain an optimal set of positions that meet your requirements.
The settings available in this panel offer you a direct access to tweak the generative algorithm.
- Cut-off MIN angle°. Describes the minimum angle from top (zenith) where positions generation is allowed in the horizontal coordinate system.
- Cut-off MAX angle°. Describes the maximum angle from top (zenith) where positions generation is allowed in the horizontal coordinate system.
- Max surface ray angle°. Maximum angle deviated from the mesh normals for generating positions different orientations. A value of 1 would generate positions with an orientation asymptotically the same with selected normals on the mesh.
- Tolerance radius. Describes the radius in milimiters of a sphere casted around each generated position where no other point is allowed. In effect, it spreads positions more evenly.
- Max images. This count represents the maximum number of images permitted for the algorithm to generate. Most likely it will not generate this precise amount unless it under-generates.
- Distance. Represents the distance between the spawn position and the surface of the proxy mesh.
- Discard invalid. When activated, the generative algorithm will discard all invalid positions that Arago cannot reach at the end. It’s advisable to uncheck this option to gain a deeper understanding of the algorithm’s functionality.
