How Can We Help?
LightArray Control Panel
This guide provides instructions for operating and managing LightArray through its integration with Arago Control. Please note that this manual may be updated as the software continues to develop.
1. Main Panel
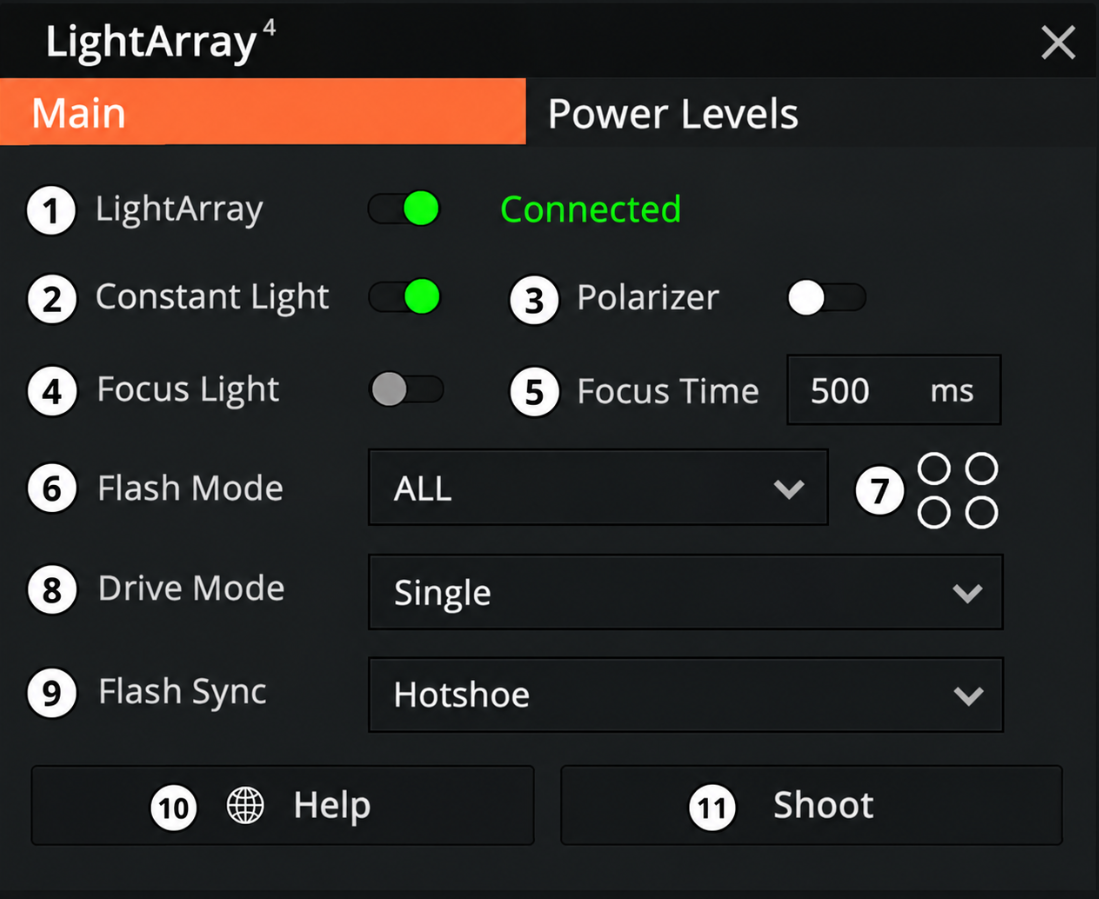
1. LightArray – toggle
Used for enabling and disabling the connection to the LightArray Controller. There are three connection states:
- Disconnected
- Pending. In this state Arago Control is querying the network for any available LightArray.
- Connected. Once connected the fans are automatically turned on together with the Model Light (if applicable).
2. Constant Light
This mode is helpful for verifying and fine-tuning the cross-polarization alignment between the FlashLED and the polarizing filters. The modeling light can also assist the camera in focusing when ambient light is insufficient.
3. Polarizer
The toggle changes the electronic polarization state (ON/OFF). The toggle is interactable only when operating in Flash Mode ALL.
4. Focus Light
Available with non manual focus modes, this option makes the LightArray shoot a focus assist light when the camera is attempting to focus.
5. Focus Time
The duration of the focus light in milliseconds.
6. Flash Mode
There are currently 5 predefined triggering modes:
- ALL
This is a standard one-shot mode triggering all 4 Flash LEDs simultaneously, typically used for regular photogrammetry workflows. This mode uses the currently selected Polarizer state. - N LIGHTS
Captures one image with only the selected lights ON, using the current polarization state. - PALL + N LIGHTS
Captures two images: the first with all lights on and polarized, and the second with only the selected lights on, using the currently active polarization state. - ALL + PALL
This is a two-shot mode triggering all 4 Flash LEDs simultaneously – once with Polarizer state OFF and once ON. - PALL + ALL
A reversed ALL + PALL. - OLAT
OLAT stands for one-light-at-a-time. It triggers your camera with the LightArray 4 times – once for each Flash LED (from 1 to 4). The Polarizer default state for this mode is OFF.
When using OLAT for a long period of time, we recommend to remove the magnetic polarizing filters from each Flash LED unit. - OLAT + POLAT
In addition to OLAT, this mode also triggers a POLAT (polarized-one-light-at-a-time) set of images. It triggers your camera with the LightArray 8 times – twice for each Flash LED (from 1 to 4) in both ON and OFF polarization states. - OLAT + PALL
An extra polarized image is triggered with all lights on in addition to an OLAT sequence. - POLAT + OLAT + ALL + PALL
A mixture of all. Useful when it is required for the sets for PG need to be taken from exactly the same position as the images for PBR reconstruction.
8. Drive Mode
The Trigger Mode corresponds to the camera’s Drive Mode. We currently support Single and Continuous drive modes. Arago Control automatically detects this setting from your camera if the Camera Tethering feature is active and the camera has been detected.
9. Flash Sync
- Hotshoe
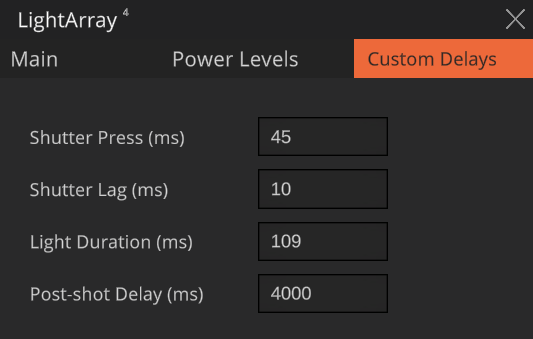
Reads from the camera the hotshoe response to determine how to run the flash mode sequence. This should always be used when the camera provides hotshoe response and it usually the go to setting. - Custom Delays
This is opens an advanced settings panel where you can manually specify camera intrinsics and LightArray settings. This comes in useful when the camera does not have a hotshoe response. Many camera models will not provide a hotshoe response when using silent shooting or the electronic shutter, with only a few exceptions among high-end models.
10. Help Button
Links to this documentation.
11. Shoot Button
This button triggers the currently selected LightArray Flash Mode.
Using this button will also help calculate travel time estimations by measuring how long it takes to complete the selected sequence. The sequence execution time depends on the camera settings such as drive mode, shutter speed, memory buffer and so on.
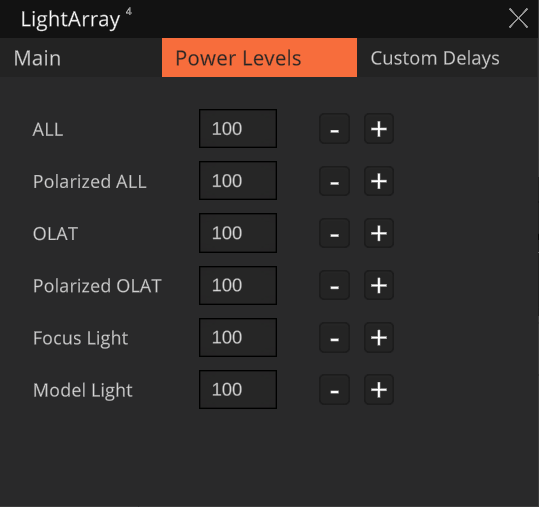
2. Power Levels
For example, when using OLAT + PALL, the LightArray triggers one flash at a time during the OLAT sequence and all four flashes for the PALL image. Since the PALL image receives significantly more light than the individual OLAT images, the power levels should be adjusted accordingly.